Friday, March 28, 2014

DIY CNC Build in Switzerland - Linear Rails for Y Axis -Success :)

In the previous post I have explained why I failed to get the Y axis sliding. Now I have it fixed :) As I have mentioned earlier, I have used MDF(Unfortunately in Switzerland, I cannot find HDF easily) to create the rail support for Y axis. I have used Inkscape to create a template for drilling. I glued the paper template to the MDF and drilled the holes with the drill press.


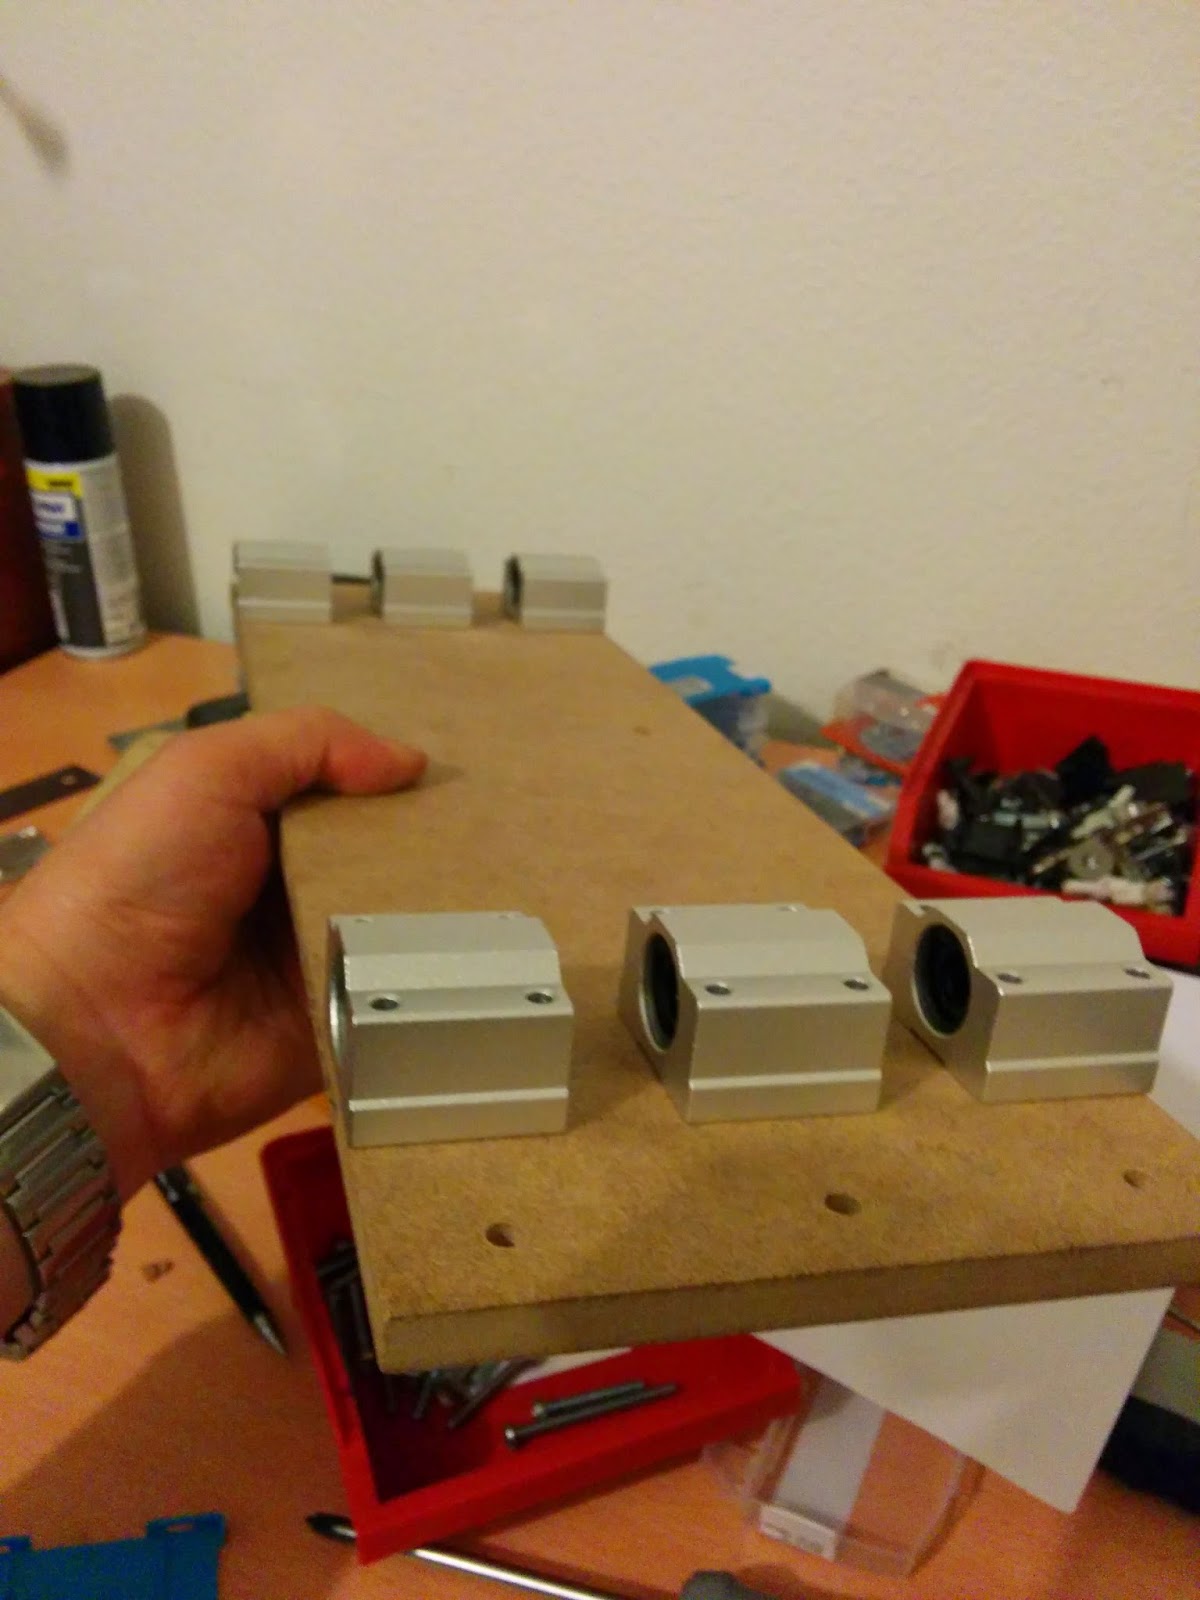
The most important thing is to drill the holes at the EXACT location, otherwise your steel rod will lock into the bearings and will not move or move with a lot of friction. Before tightening the bolts for the linear bearings, we need to use the steel rod in place to align the linear bearings. This will also reduce the risk of locking. Below you can see the final MDF structure with all 6 bearings attached to it.

The whole MDF structure is attached to the aluminum extrusions as shown below.


The MDF must be a perfect cut along the sides, they must be exact width of gantry and the sides must be parallel. As I have changed the plans:), I needed to disassemble the base frame and drill new holes for the new rail locations. To mount the steel rod I used 12mm shaft supports as seen below. One of the face plates in the base frame has also a hole with diameter of 13mm. This hole is used to slide the steel rod into its place. This hole will not be seen as it will be the back plate.


Images below show how I inserted the steel rod into place and mount the gantry.


Below you can find several pictures that show the details from different angles. Also, I have just placed the spindle motor to its final location to visualize how will it look like.


Here also you can find the video of rail moving as expected.

Thursday, March 27, 2014

DIY CNC Build in Switzerland - Linear Rails for Y Axis -Fail :)

This post will be showing how I failed with my first attempt for Y axis :D. I am sorry for the people waiting for a post with actual working results. But I had no success with what I did. I will explain you what failed and how I will fix the issue. The target was to attach the linear bearings to the gantry and attach the steel rod to the bearings for sliding on Y axis. Previous post shows how I intend to build a connection plate between gantry extrusions and bearings. I drilled the holes to the plate.
As you see above I have the bolts sticking out of the aluminum plate, so I needed to cut out some piece from the holes with a special cutter bit.
The bolts must have zero clearance from the plate surface to fit perfectly to the extrusions. In order not to lock on the rod, you need to leave the bolts not tightened. I pushed the rod through and tightened the bolts later.
What I got was a good base for Y linear motion that could be attached to gantry.
What I expected was failed! The problem was not the rail block that I built, but the gantry extrusion that I was bolting. When I started bolting and tightening the bolts, the steel rod locked in the rail and did not move at all. This was due to the thickness of aluminum that I selected as plate(3mm). If I loose the bolts the gantry slides but there occurs a backlash like movement in z axis. So all the work is now trash:) I will solve the problem with an MDF or HDF piece under the gantry. Also one more benefit. I will move the linear bearings under the cutting table so this will reduce the probability of getting dust into the linear bearings. Hopefully I will publish a success story next time :)

Tuesday, March 25, 2014

DIY CNC Build in Switzerland - Building the CNC base frame

Next step is to build the base for the CNC structure. In order to build the base frame I needed aluminum with thickness 15 mm. This is so hard for me to find in Switzerland. I found an aluminum profile in a local store which is actually used in ceilings of houses or alignment of curtains:)
This profile was 2m long. It has a support in the middle as you see in the above picture. But this was still not strong so after cutting the profile according to my design, I decided to support it with some wood internally.
Now it is time to drill some holes:) Drilling is the trickiest part actually. The holes must be accurate to have the structure align correctly. I have measured the points several times before drilling.
I have used my drill press to drill the holes. If you don't have a drill, build a drill guide to have right angle holes.
Now the holes were drilled, time to assemble the base...
The connection of the aluminum profiles is done with 4 aluminium profiles. In my sketchup I have only 2 but I realized that it would be good to have more support:) Last picture above shows the gantry placed in the base frame to visualize how will it look like after I finish the assembly. And, here comes the most tricky part up to now. The linear bearings are wider than the profile I used.
In my design, I have used an aluminum plate to connect the bearings to the profile.
Again measure several times and drill once. This is the most importartant moving piece that you will drill. So it must be incredibly accurate.
I have calculated the holes based on the rail datasheet and checked the holes several times. It was already late night so I could not finish drilling the rail plate. So till next time...

Friday, March 21, 2014

DIY CNC Build in Switzerland - Building the Gantry

Finally, I finished cutting the aluminium extrusions according to my design.
As you can see in the picture above, there is only one problem: the hacksaw traces. The cut was perfectly straight and right angle. Here is the picture of all the pieces cut for the gantry.
All the pieces are cut with the jug I built except the middle size ones. I have cut those with my angle grinder:) So, lets start building the gantry. In order to mount the aluminium extrusions to eachother, we need a special set screw, which has a tapered screw hole in it. This can be bought from special stores or aluminium profile sellers.
What I did was to screw this set screw into the hole of aluminium extrusion.
You should clear 5 mm in the bore of aluminium extrusion to mount the T type aluminium extrusion mount bracket. This comes in two pieces. One is attached to the set screw and one is slided into the target extrusion for mounting.
The two pieces are mounted together via these connection point with 2 screws.
Actually, while I was trying to fit the extrusions, I found a better design to mount my steel rods. So I have updated the Sketchup desing(not uploaded yet). See below.
The distance between the alu extrusions should be exactly same at both sides to make sure smooth assembly. So here is the (almost)finished gantry. I need to cut some pieces to add to top of the gantry for better support.